Ceiling Repairs and Restoration

Ceiling Repairs Perth and restoration are vital processes that revitalize and enhance the overall aesthetics of your home or business. These methods can address common issues such as water damage, cracks, and outdated textures to provide a refreshed and captivating interior.

Understanding the various issues affecting a home’s ceiling can help tailor repair approaches and manage associated costs. Some of the most common problems include:
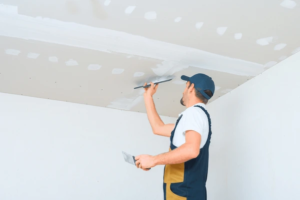
If you find cracks in your ceiling, the first thing to determine is whether or not they’re structural. A single hairline crack may be cosmetic and need repainting or re-plastering. Still, any kind of widening or lengthening indicates that the structure needs to be examined by a professional.

In older homes, these cracks could be caused by normal wear and tear or foundation settling. In other cases, they might be the result of a powerful storm that brought in heavy rainfall or even a possible plumbing leak located directly above the ceiling.

It’s best to repair drywall cracks using the same method that you would use for installing seams. Start by taping over the crack with fiberglass mesh tape—the same kind of drywall tape that’s used to connect seams when you install drywall in your home. Cover the tape with a thin coat of joint compound, letting it dry overnight. Next, cover the compound with a skim coat of mud, using a trowel to create a skip-textured finish. Then apply two topcoats of paint.

Ceiling cracks can also be repaired with a filler such as bonding or cement. If you choose to do this yourself, make sure that the crack isn’t sagging and that your ladder is stable enough to work on. It’s also a good idea to put down a sheet of plastic beforehand since you’ll be loosening debris, applying mud, and generally making a mess. You should also wear a dust mask and eye protection.

In any case, if the cracks are showing serious signs of red flags, you should get in touch with a professional—like a foundation repair pro or a structural engineer—to examine the structure and provide you with a detailed report. They’ll be able to identify the cause of the problem and suggest steps for addressing it before it gets worse. Structural damage can have devastating consequences for your building’s actual structural integrity, so it’s not something that you want to take lightly. Getting a professional assessment as soon as you spot a crack in your ceiling can prevent it from getting worse and potentially damaging your home.

Sagging

Ceilings are one of the most underappreciated parts of a home, but they’re also a vital structural component. When a ceiling starts to sag, it’s not just an eyesore – it can be a sign of serious structural issues that need to be addressed immediately.

Sagging ceilings can be caused by a variety of factors, including age, water damage, and poor construction. Ignoring sagging ceilings can lead to more severe problems, such as a collapsed or damaged house. In addition, sagging ceilings may also be a fire hazard.

It’s important to identify the cause of a sagging ceiling before performing any repairs, as different causes require different solutions. For example, water damage may require additional work, such as repairing leaks and improving ventilation. A professional home inspector will be able to recommend the appropriate steps to take for each issue.

When sagging ceilings are caused by a lack of proper support, the best solution is often to install a ceiling lift system. This involves attaching metal or wooden supports to the joists above, which help to evenly distribute the weight of the ceiling across multiple points and prevent future sagging.

Alternatively, a ceiling contractor can also repair the sagging ceiling by removing the existing drywall, re-leveling it, and re-attaching it with new drywall. This will restore the strength and durability of the ceiling, as well as improve its appearance. It’s important to use high-quality drywall and paint to ensure that the ceiling is protected from future damage.

A sagging ceiling is not just an eyesore, but it can be a sign of major problems in the structure and foundation of a home. If it’s not repaired quickly, it can lead to significant structural damage and cost a lot of money to fix. To avoid this, homeowners should always call a professional to inspect and make the necessary repairs as soon as possible. If they’re looking at buying a property, it’s also a good idea to have a building inspection done by professionals, which will help identify potential issues such as sagging ceilings and other damage.

Water Damage

Water damage can cause a host of problems including structural issues, mold and mildew. It’s a high priority issue and must be addressed as soon as you notice the signs of water damage on a ceiling. If left untreated, water damage can weaken the house frame, compromise your safety, or create a perfect environment for microbial growth.

One of the most obvious signs of water damage in a ceiling is discolouration. It usually takes the form of a dark, ring-like mark and may be yellowish, brown or black. These marks can be caused by leaking roofs, plumbing or the heating system. The more the water is allowed to penetrate, the more severe the damage will become.

Repairing the water damage in a ceiling can be an extensive job depending on the extent of the damage and the initial cause. You’ll need to open up the ceiling to find the source of the water penetration and fix that first before you can address the ceiling itself. After the leak is fixed it’s important to allow any affected materials, including the drywall, to thoroughly dry before you proceed. You can speed up the drying process by opening up windows and using a dehumidifier.

If the area has been stained, it’s best to treat the stain with an oil or shellac-based primer before repainting the ceiling. This will help prevent the stains from coming back in the future. Once the area has been repaired and is completely dry, it’s time to repaint the ceiling.

While you may be tempted to do this yourself, it’s best to call in a professional for any major repairs esp,ecially when dealing with water damage. Trying to patch and paint over water damage can make the problem worse and lead to further issues down the line.

Professionals can repair ceiling leaks, re-install drywall, and even replace the whole ceiling. They can also provide a full inspection and identify the source of any moisture problems. They can then recommend any necessary repairs to the plumbing or roof. They can also give you advice on how to avoid any further damage from a ceiling that has been damaged by water in the future.

Mold

Mold in the ceiling can be extremely dangerous, so you’ll want to have this issue repaired by a professional. You’ll need to remove the molded drywall and any infected insulation, treat it with a fungicide, and allow it to dry completely before you proceed with any other repairs. You’ll also need to repair the source of the water leak and take steps to prevent future mold growth (e.g., by using a dehumidifier in your home).

Black mold growth is typically due to excessive humidity and lack of proper insulation. This is especially common in older homes.

If the spores are centralized in one area and not spreading, you may be able to get away with treating this yourself. If you’re willing to spend a little more, you can hire a fungicide specialist to use a chemical spray that kills the spores and eliminates the odor. This treatment will need to be repeated regularly to ensure that the fungicide doesn’t wear off.

This type of mold is usually caused by water leaks, poor ventilation, or missing insulation in the ceiling cavity. It’s not uncommon to find a patch of mold along the wall/ceiling junction in rooms with ductwork running through it. Damp areas that don’t have a brown hue are often caused by condensation; the best way to tell if this is the case is to use a moisture meter and wait until it has rained before you test. Moisture resulting from condensation will not register on the meter, but an actual leak will.

You can prevent condensation and excessive humidity from causing problems in the ceiling by installing ceiling cladding and ensuring that there is enough insulation in the attic. You can also install exhaust fans in bathrooms and run them during and after showers, baths, and washing dishes to help reduce moisture. You can even install a circulating fan or open windows to improve ventilation. Regularly cleaning and drying shower stalls, towels, and bath rugs can also help. For severe or widespread issues, you’ll need to repair the roof and use a dehumidifier in the home.
Epoxy Garage Floors – Transform Your Garage Into an Extension of Your Home

Epoxy Garage

Epoxy offers a transformative solution for garage floors that combines functionality with exceptional aesthetics. Bare concrete floors tend to shed dust that can settle on cars, tools, and other items stored in the garage. Epoxy coatings minimize dusting and are formulated to withstand the impact of dropped tools. For professional help, contact Garage Epoxy Waco TX.

For best results, degrease the floor prior to applying your choice of epoxy product. Be sure to follow the manufacturer instructions for proper degreasing.

1. Aesthetics

Epoxy is highly customizable and offers a blend of durability and style, making it a popular choice for garages. It’s resistant to spills and damage, and it can be tinted or textured for improved traction and safety.

Epoxies are also easy to keep clean. Sweeping and mopping are usually all that’s required to maintain their smooth, high-gloss appearance. The sheen reflects light and improves visibility, minimizing the need for additional lighting fixtures.

Before an epoxy floor can be installed, the concrete must be thoroughly cleaned and prepared. This typically involves degreasing and mechanical grinding to create a rough surface that the epoxy can bond with. Moisture testing is also important, as excessive moisture can prevent proper adhesion.

2. Durability

Homeowners often use their garages as a space for woodworking, hobbies and their vehicles. In order to protect the garage floor, many choose to invest in a floor coating.

Epoxy flooring is extremely durable and can withstand heavy machinery. The coating also protects against scratches, stains and abrasions. Epoxy flooring is made of epoxy resin and polyamine hardener that, when combined, triggers a curing process.

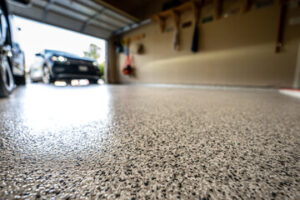
In addition to its durability, an epoxy garage floor coating has a seamless surface, which makes it easy to clean and maintain. The surface also helps minimize dusting, which is an advantage for homeowners with respiratory sensitivities. In addition, homeowners can personalize their floor with color flakes to add visual interest and camouflage dirt and cracks. These benefits make garage floor coating a cost-effective and long-term investment. This is especially true as it reduces the amount of time and money spent on maintenance and repairs.

3. Aesthetics

A well-maintained garage is an asset, adding value to a home and providing a versatile space for storing vehicles, tools, and equipment. Epoxy’s durability and resistance to chemicals and stains make it an attractive choice for garage flooring, while its impervious nature resists spills and moisture, reducing the need for frequent repairs.

Color options for epoxy garage floors allow homeowners to choose a theme that complements their aesthetic preferences. Dark-colored epoxy can emphasize brightly colored tools and equipment, while lighter colors bounce light to create a more open feel.

Moreover, epoxy floor coatings can be tailored to suit specific usage preferences, from a smooth finish to a more textured surface to improve traction and safety. In addition, metallic pigments and decorative flakes can be added to the mix for a customized look. The versatility of epoxy also reduces dust emissions, which can be helpful for families with respiratory issues.

4. Aesthetics

A well-organized garage should be an extension of your home, not just a space to store your stuff. A durable epoxy floor provides a polished look that elevates your garage to an inviting area for hobby work, crafts, or even a playroom.

Epoxy floors are nonporous, reducing the risk of liquids or chemicals seeping into the concrete and damaging it over time. The coating resists stains from automotive fluids, oils, and other chemicals often found in garages.

An epoxy floor can be tinted in a variety of hues, allowing homeowners to establish a theme for their garage and create a space that is uniquely theirs. A glossy epoxy coating is especially appealing because it reflects light, making the garage feel bright and inviting. It also comes in a variety of textures and finishes, including flakes that add visual interest.

5. Aesthetics

The garage is often seen as a glorified dumping ground for tools, equipment, and boxes, but it doesn’t have to be this way. Epoxy flooring provides a sleek and attractive floor surface that can enhance the aesthetics of the space.

Its glossy finish reflects light, brightening the room and reducing the need for additional lighting fixtures. This makes the garage feel more spacious and inviting, making it an ideal environment to work on projects or enjoy hobbies.

Additionally, epoxy is easier to maintain than traditional flooring materials. A simple sweep and occasional mopping is all it takes to keep the floor looking pristine. This is a welcome benefit in a busy space that demands efficiency.

6. Aesthetics

Many people treat their garage as a glorified dumping ground, but it doesn’t have to be this way. With the right flooring and other design elements, you can transform your garage into an attractive, functional extension of your home.

Epoxy floors are renowned for their durability and resistance to spills, chemicals, and stains. This makes them an ideal choice for high-traffic areas, like those used for parking vehicles and working on DIY projects.

Aesthetically, epoxy floor coatings can be customized with a variety of color options and designs. For example, if you choose an epoxy with broadcast flake, you can select the style and size of flakes to create a unique, eye-catching look. Additionally, epoxy floors are designed to reflect and amplify natural light, making your garage feel brighter and more spacious.

7. Aesthetics

Epoxy garage floors are a popular choice for homeowners looking to improve the functionality and aesthetics of their spaces. These floor coatings are strong and durable, with a finish that resists spills, chemicals, and stains.

They can also be customized to suit specific tastes and needs, whether you want a high-gloss finish that brightens your space or a more textured surface that provides better traction for safety. Epoxy can also be tinted with color or embedded with decorative flakes to create a unique look.

The glossy sheen of epoxy can help amplify light in your garage, potentially reducing the need for extra lighting fixtures. It can also highlight the colors of your tools and equipment, creating a striking contrast against the dark concrete floor. This makes your space feel larger and more open. It can also conceal dirt and dust more easily than other flooring options.

8. Aesthetics

The garage is a unique space that can be transformed from a utilitarian workspace to a beautiful and vibrant area of the home. Epoxy is one of the many materials that can help homeowners achieve their aesthetic goals in the garage.

Epoxy floors are highly resistant to common garage spills like oil, antifreeze, and paint, making them easy to clean and maintain. They also resist scratches and stains from the heavy weight of vehicles and equipment, protecting the floor’s surface and improving its overall appearance.

Epoxy flooring can be tinted in a variety of colors to reflect personal style preferences and establish a theme for the garage. It can also be textured to add texture and improve traction, increasing safety and security in the garage. Epoxy is UV-resistant, reducing the risk of discoloration and deterioration over time.

9. Aesthetics

Although garages are typically regarded as utility spaces, attention to aesthetics can elevate the space into a visually appealing extension of the home. Epoxy floor coatings offer a wide range of colors that can be chosen to reflect personal style preferences and complement the garage’s overall design.

The durability and stain resistance of epoxy floors also make them ideal for achieving a professional-looking garage environment. Unlike porous materials like bare concrete, epoxy floors wipe clean with ease, allowing homeowners to maintain a neat and tidy environment with minimal effort.

In addition to a variety of color options, glossy epoxy flooring can bounce and amplify light to create a brighter garage space that feels more inviting. However, the installation process can leave the garage unusable for several days while the coating sets, which requires planning ahead and finding alternative storage solutions for tools and vehicles.

10. Aesthetics

Often, garages are neglected as mere storage spaces for tools, vehicles and junk. However, it’s possible to reclaim the space as an attractive extension of the home.

Epoxy offers a wide range of color and texture options, allowing homeowners to create a look that fits their style preferences. Its glossy finish reflects light, brightening the garage and making it feel more open.

Before an epoxy floor coating is applied, the concrete must be thoroughly cleaned and degreased. Moisture testing is also crucial to ensure the concrete can bond properly with the epoxy. After cleaning and preparation, a primer is applied to promote adhesion. Then, solid or water-based epoxy is applied in thick coats with an extended paint roller. The resulting surface is durable, impact-resistant and attractive. It can be textured, slip-resistant or even colored with silica chips or translucent polymer beads.

How to Add Value to Your Home With Custom Glass

Glass Governor Of Atlanta tabletops, shelves, and art pieces can elevate a home’s aesthetic and add to its value. But what does it take to create these unique decor elements?

Custom Glass

The process begins with a design consultation where your product vision is discussed and understood. Then, high-quality glass is chosen based on its design and functionality.

There’s nothing that elevates a space like a beautiful glass surface. With the right design and materials, custom pieces can make a big impact on the look and feel of any room. Whether you’re looking to add some privacy, create a specific aesthetic or simply enhance your home’s curb appeal, custom glass can be the perfect solution.

The first step in creating a custom glass piece is designing the project with a professional. During this consultation, your needs, preferences and ideas are discussed and refined to ensure the final product aligns with your vision.

After the design is agreed upon, the next step is choosing the glass type and frame material. This will be based on the design specifications and any additional features requested. The fabricator will then begin crafting the glass to the exact dimensions and specifications of the approved design.

This can be a tedious process, especially when working with large sheets of glass. Modern fabrication plants have a range of equipment to help speed up the process and provide the highest level of precision. These tools include Computer Numerical Control (CNC) and water-jet cutting machines. These machines can accurately cut and shape the glass, making it ready for the installation process.

Glass fabrication also requires a tempering oven to heat the glass and quickly cool it, which helps make the glass stronger. Fabricators need a high-quality, efficient tempering system to produce accurate, consistent results and keep up with production demands.

Once the glass has been shaped, it is then etched and finished to achieve the desired aesthetic. This can be achieved through etching, engraving, coating or other additions. The finishing touches are what can really make the difference between a good and great glass product.

During this time, your glass professional will also work with you to decide on a timeline and payment schedule for the project. Once all the details have been finalized, the contract will be drawn up and fabrication of the windows can begin. This will be based on the exact specifications of the approved design and adhering to the highest quality standards.

Materials

One of the best ways to increase your home’s value is by adding custom glass. This can be a large scale project that adds a focal point to your home, or something more subtle like a door to the patio. Regardless of what type of glass you choose for your house, it’s important that you choose the right materials for the job. This means working with a company that offers a wide range of options and has on-site product showrooms so you can see the quality of their work for yourself.

The right glass company will have a wide variety of materials to suit your needs, from standard window glass to laminated safety glass. They’ll also have the equipment to cut these materials into any shape or size you need. They’ll double-check all measurements before they begin working on your project, and will ensure that the finished piece is up to code.

Some common glass types include annealed glass, which is often used in picture frames and other light applications. This type of glass does not shatter into small pieces, and will instead crack into large shards if broken. Laminated glass, on the other hand, is safer and more durable than annealed glass. It has been heat-treated and bonded with a strong adhesive, making it more resistant to damage.

Another type of glass is tempered glass, which is used in shower doors and other areas where higher safety standards are required. This type of glass is heated to extreme temperatures, which makes it stronger than regular glass and harder to break. It is also treated with an acid wash to create a surface that is easier to clean and more resistant to scratching.

Other specialty glass includes clear float, patterned, frosted and coated glass, as well as mirrors. These can be used in a variety of applications, such as partitions, office furniture and interior design. They provide privacy and allow natural light to pass through, while still allowing you to see out of the space.

Other special glass includes mirrors with a sandblasted finish, which is more reflective and less glare-prone. Rounded corners are also available, which can be especially useful for safety reasons.

Cutting

Cutting glass into the desired shapes is a vital step in any project. The precise cutting process ensures that the finished product aligns with your design specifications and enhances the aesthetic of your space. It also reduces material waste and allows for easier handling. The most common cutting methods include manual sanding and the use of automated tables with carbide cutting wheels.

A successful cut begins with a clean surface and precise markings. In addition, the scoring wheel must be free from any obstructions that might weaken the fissure produced by the traversal of the tool across the surface. This is especially critical when cutting thicker glass types.

When using a hand-held cutter, apply consistent pressure to the glass along the score line. Inconsistent pressure can result in uneven breaks, which can be difficult to correct. Also, be sure to dip the cutting wheel in oil before use to minimize friction and improve its performance.

A professional cutting machine can help speed up the process and provide more accuracy in complex designs. However, the use of these machines can be costly, requiring specialized machinery and training costs. Furthermore, they can be limited to certain types and thicknesses of glass due to their size and weight.

After a smooth and precise cut, the edges of the glass should be sanded to remove sharpness and render the piece safe for handling. The process can be automated for more consistency and ease. In addition, sanded edges are less likely to chip, reducing the risk of injury.

A glass edging machine can further smooth and finish the edges of a piece, enhancing its appearance. This process can be customized to fit your needs, with options including a safety seam, beveling, and flat polishing. The safety seam involves sanding the sharp portions of the edge to make it safe for handling, while beveling and flat polishing create an elegant finish with a 45-degree angle chamfer on both sides of the glass. In addition, the edging machine can add a variety of other decorative touches to the glass, such as a frosty satin or matte finish.

Customization

Custom glass is a great way to enhance your home and increase its value. The process involves designing a custom piece and selecting the materials that are best suited to your space. The design team will also select the glass type, frame material, color, texture, hardware, and additional features like tinting. Once the design is complete, it will be presented for review and approval. This is the perfect time to ask for any changes or modifications that you may want to make.

Adding customized glass is a wonderful way to update your kitchen, bathroom, or living room. It will give your home a unique look that will set it apart from other homes in the area and attract buyers. This is a great investment that will pay off in the long run.

Once the custom glass is designed, the next step is to cut the glass. This is a complicated process that requires skill and precision. It is important to choose a glass manufacturer that can cut the glass with the highest quality standards. The company should have years of experience in the industry and will be able to provide a wide range of different types of glasses.

Glass companies that offer virtual showrooms are a great way to jumpstart the design consultation process with guidance from an expert. They can provide you with access to their catalog of existing designs and allow you to make note of those that you like. They will also be able to tell you how much the custom glass would cost and what it would be made from.

After the initial design is completed, a sample mold will be created. This will be used to create a prototype of your custom glass product. This step will help you visualize your glass project and ensure that it is a good fit for your company’s needs.

Custom glass is a great way to enhance any home or business. It offers a variety of design options, including etching and coating, which can be added to standard glass products to add a unique touch. It is also a great option for businesses that need custom glass components and bottles for their products.

What Types of Flooring Are Available?

Flooring Fairfield NJ is a major investment, and the right choice can impact how long it lasts. It’s important to understand what is available, especially when it comes to sustainability and adherence to codes.

The room’s function and location will influence what type of surfacing is best. Hardwood floors refinish easily and can last decades, while cork is an eco-friendly choice.

Hardwood floors can add elegance and character to your home, and they can also increase the resale value of your property. But before you pick a hardwood, consider its thickness and hardness as well as the design aesthetic that fits your space. Generally, harder woods are more durable, and they stand up to more abuse than softer woods. Examples of hard woods include oak, maple, hickory, and birch. Softer woods include pine, cedar, and fir.

Another important characteristic to look for in a hardwood is its graining, which determines how much it shows scratches and marks. A grainier hardwood like hickory or oak will show less markings than a smooth exotic or domestic maple, and you can further reduce the appearance of scratches by opting for hand scraping or other slight distressing techniques.

Aside from color and graining, the species of wood you choose is an important factor in determining how durable your hardwood will be. Domestic woods such as oak, maple, and hickory are incredibly strong, while walnut and cherry offer beautiful color variations. And if you want something even stronger, ash is the wood of choice for baseball bats and axe handles. It’s also the hardest domestic hardwood, with a Janka hardness rating of 1380.

You can purchase both solid and engineered hardwood flooring, and each type offers a different return on investment depending on your preferences. Solid wood is the traditional hardwood option and consists of solid planks of the desired thickness that can be sanded down and re-stained, but you can also buy pre-finished floors to save time on installation and maintain a consistent look throughout your home.

Most hardwood manufacturers source their wood responsibly, and you can check for this with the Forest Stewardship Council (FSC) label to ensure that you’re buying a sustainable product. However, some exotic hardwoods aren’t certified as sustainable, so you may want to do a little research before purchasing these products.

Once you’ve selected the wood species and grade, it’s time to decide whether you’ll opt for solid or engineered hardwood flooring. Both are durable and beautiful, but engineered wood has many layers of wood glued together, which increases its stability and moisture resistance.

Carpet

Carpet is a popular, soft flooring option that adds warmth and texture to rooms. It also helps to reduce noise and provides acoustic benefits. It is available in a wide variety of colors, materials and styles to complement any design aesthetic. While it’s not as durable as hard surface flooring, with proper care and maintenance carpet can last up to 25 years.

When designing your carpet, consider the fiber type and color to help create the look you want. You can also choose from a range of textures to suit your space, including plush, saxony, frieze, cable and sculptured. The pile height determines the level of comfort and durability in your carpet. The heavier the twist in the individual fibers, the more resistant it is to matting and crushing. The pile also creates the texture of the carpet, which hides dirt and wear.

The tufts in a carpet are held in place with a layer of padding, which is installed under the carpet to provide cushioning, insulation and shock absorption. The padding can be made from a number of materials, but foam rubber and polyurethane are commonly used as they offer good cushioning, abrasion resistance and tuft bind.

Another type of padding is the barrier pad, which is designed to protect the subfloor from moisture and prevent stains from penetrating the underlying floor. The barrier pad can be made from a variety of materials, including polyethylene or vinyl.

Patterned carpeting uses varying shades of the same color to create a textured appearance that helps hide soiling and wear. The pattern is usually repeated over the length of the room to create a consistent, finished appearance. The color is then matched across the seams, either in a set match or drop match.

Olefin (polypropylene) carpets are an alternative to wool carpets. They are more affordable than wool, but don’t offer the same level of performance and appearance retention. In general, olefin carpets are best for areas where the budget is a major consideration and long life expectancy is not an issue.

Tile

Tile flooring is tough and long-lasting, a great choice for high traffic areas. It is available in a wide variety of colors, textures and materials. It’s a popular option for kitchens and bathrooms.

Whether glazed ceramic, porcelain or natural stone, tile is extremely versatile in terms of color and design. It can look sleek and modern or rustic and old-world. It is a great option for those who want the beauty of stone but prefer something more durable and cost-efficient than marble or granite.

The advantage of tile is that it’s naturally water-resistant, which makes it a good choice for bathrooms and kitchens. It also resists stains better than other types of floors, making it easy to clean. It does not support the growth of viruses, fungi and bacteria, so it’s an excellent choice for those concerned about health issues like allergies.

It is relatively easy to maintain, requiring only regular wiping and sweeping. It is also highly durable, resistant to scratches, scuffs and other damage. If you choose to install tile on an upper floor in your home, keep in mind that it is heavy and needs a stiff floor framing to prevent cracking.

Because of its hard surface, tile does not amplify noises in your home, such as footsteps or rambunctious pets. However, some people do not like the feeling of tile underfoot. In such cases, it may be a good idea to add thick area rugs to the rooms in your home with tile floors.

To lay tile, first make sure the surface is clean and dry. If necessary, patch the floor to even out any unevenness. Then apply a thin coat of adhesive with a trowel. Next, place spacers between the tiles and use a level to ensure they are perfectly straight and even. Begin laying the tiles from one wall (call it A) to the other wall (call it B), working in small sections at a time. After adjusting the A-to-B line, mark a straightedge parallel to and against the center tile on one of the walls (call it C). Repeat the process with the other straightedge (D) for the other side of the room.

Vinyl

Your home takes a lot of wear and tear, so it’s important to have durable flooring that can withstand a busy lifestyle. Vinyl is a versatile and inexpensive option that comes in a wide range of styles to suit your decor. It resists scratches, dents and stains, making it easy to clean and safe for kids and pets.

There are two main types of vinyl: standard and luxury. Both can be purchased in either tiles or planks, but the differences lie in the construction and design. Standard vinyl, usually referred to as vinyl composition tile (VCT), has a layer of clear protective coating over a photographic design layer that can resemble stone or ceramic tile, or even wood.

It’s available in a variety of textures, colors and patterns. Some have a heavily antiqued or distressed look that’s peppered with nail holes and scrapes to replicate the appearance of old floors. It’s also available in a number of widths to eliminate seams and match a room’s dimensions.

Standard vinyl is a resilient floor, which means that it’s warm on your toes and absorbs shock, making it comfortable to walk on for long periods of time. It has a good lifespan and can be installed in high-traffic areas without worrying about the wear and tear.

Luxury vinyl plank, or LVP, has a waterproof core to prevent swelling and damage from moisture. It can be made to resemble the appearance of wood, stone and ceramic tile, and is available in both rigid and flexible planks. It’s a top choice among homeowners and has many of the same benefits as hardwood, including durability and ease of maintenance.

Both are produced by heating small pieces of PVC, then pressing them into thin layers that can be glued to form sheets or cut into tiles. The tiles can then be interlocked to form a floor, or they may be grouted. Vinyl can be made to look like ceramic or porcelain tile, natural stone, or hardwood, and is available in both click-together floating floors and glued down installation options.

Specialties of a Successful Kitchen Remodel

Scrolling social media, pinning kitchen design ideas, or walking by home improvement stores are great ways to get your remodel wheels spinning. However, a successful kitchen remodel requires many different specialties.

Kitchen Remodel

A well-executed kitchen remodel increases your home’s resale value. However, you must have a clear vision, goals, and budget for the project.

Cabinets are one of the most expensive components of a kitchen remodel and a key element of its overall design. They are typically a mix of upper and lower cabinets that wrap around appliances like refrigerators. They may be stacked or hung on the wall or from a base. Adding cabinets to your kitchen can significantly increase its storage capacity. They can also be used to add an element of elegance and style. Even simple cosmetic accents like new hardware, crown molding on the top and a repaint can dramatically improve a cabinet’s look.

Depending on the manufacturer, cabinetry is usually constructed of solid wood or engineered materials such as plywood and MDF (medium density fiberboard). Cabinets with solid wood doors are more expensive than those made from veneer over MDF. They are typically glued with dovetail joints or other industrial methods for strength. Solid wood cabinets are more durable than MDF or particle board but can warp if exposed to steam, water or other liquids.

The quality of the cabinetry will directly affect its price. Entry-level cabinetry uses less expensive materials. These include particle board, MDF covered with foil-faced molded wood or plastic laminate. It also includes lower-quality hardware (pulls, hinges and glides).

Many homeowners opt for a hybrid solution that combines stock cabinets with custom modifications. This allows for a wide range of styles, sizes and specialty features at a more cost-effective rate than a fully-custom kitchen.

A kitchen remodel can increase your home’s value, as well as make it easier and more convenient to use. According to the 2022 Remodeling Cost vs Value report, a mid-range kitchen remodel will return about 30.7% of its cost.

Other home improvement projects that can increase your home’s value include a bathroom remodel, replacing an outdated bathtub or shower with a luxurious freestanding tub, installing a new fireplace and adding solar panels. The return on investment for a new bathroom will depend on the size and scope of the remodel, as well as your local market. Compared to other renovations, bathroom remodels have the highest ROI.

Countertops

When it comes to kitchen upgrades, counters are often the focal point. While focusing on aesthetics, it is important to remember that new countertops must complement the rest of the room to provide maximum value. For this reason, a kitchen remodel should include matching cabinets to ensure the counters blend seamlessly with the design scheme.

One popular countertop option is marble, which provides a timeless look that many buyers are drawn to. Quartz is another choice that provides a modern aesthetic and offers durability. Its non-porous surface also makes it resistant to stains, and the colors available offer homeowners plenty of design options.

Other materials like limestone, soapstone, and slate are also becoming more commonplace. Each stone has its own unique features that create a distinct appearance. However, they all share in that they are heat-resistant and durable, making them a good choice for those who cook often.

If you are looking to add a pop of color to your kitchen, try copper or zinc countertops. These materials can bring a rustic or industrial feel to the space. In addition, they are easy to clean and durable. These materials may be a more expensive choice, but they can add a substantial amount of value to your home when compared to other options.

Another way to boost your kitchen’s function is to add a waste bin directly into the counters. This simple addition can make it easier and faster to throw away trash and can save floor space in a small kitchen. This is a great option for anyone who wants to minimize their impact on the environment.

Choosing the right counters is an important decision that will affect your kitchen’s functionality and style. Choosing neutral or natural colors is typically the best option for those who want to appeal to the most number of potential buyers.

If you are thinking about installing new countertops, be sure to consult a real estate agent to see how much the project can increase your home’s value. They can advise you on what types of counters are most popular in your area, and which ones would look best in your home.

Flooring

The floor in your kitchen is one of the most important elements in your remodel. There are many different flooring options available to suit your aesthetic taste and needs. You can choose from hardwoods such as white oak, black cherry, and hickory to create an elegant look, or you can go for something more durable and practical like tile or luxury vinyl (LVT).

Depending on your budget, you may also want to experiment with different patterns or designs in your floor. For example, you could opt for a herringbone pattern that can make your kitchen feel more modern. You can also add a splash of color by choosing a stain on your cabinets that complements your new floor.

In terms of sturdiness, your kitchen floor needs to be hard-wearing as it’s a work space that’s used constantly by people in the household. You should also consider how easy it is to keep clean, as a high level of maintenance will keep your floors looking their best for as long as possible. Wood is a popular choice, but you might also consider stone or even a wood-effect porcelain tile.

When it comes to the best order of events for kitchen renovations, Chip Wade recommends that you put down your flooring first 90% of the time. This gives you a fresh playing field and is better for the longevity of your remodel. This will be particularly beneficial if you decide to change your cabinetry at any point in the future as the floors under the cabinets will match up with that layout.

Regardless of the type of remodel that you choose, you should always remember that you’re doing this to improve your home. It’s easy to get caught up in the excitement of a remodel, but it’s important to focus on what’s going to increase your home’s value. This means that if you aren’t going to get a return on your investment, you should reconsider the work that you’re having done.

Lighting

When designing your new kitchen, it’s important to keep in mind that lighting can make or break the space’s overall look and feel. From the type of light fixture to the color scheme, your choices can impact how bright your kitchen is. For example, darker colors and finishes can absorb light and make the room feel smaller, while lighter color schemes and reflective surfaces can open up a small space and make it feel bigger.

The best kitchens have multiple layers of lighting to illuminate the entire room. Ambient light creates a warm, welcoming atmosphere that makes family and friends feel at home. It can also highlight artwork and other decorative elements. Task lighting illuminates work spaces, like countertops where you prepare food or inside cabinets so you can see what’s stored in the shelves. Accent lighting adds a finishing touch by highlighting unique architectural features or a collection of dishes on the counter.

One way to bring natural light into your kitchen is with skylights, which can be a beautiful addition to any kitchen. However, it’s important to consider the direction of your sunlight in the morning and afternoon, as this will affect how much daylight your kitchen gets throughout the day. Another option for bringing natural light into your kitchen is to install light-sensing artificial lights, which adjust their intensity based on how much sunshine is available in the room.

When choosing the right light fixtures for your kitchen, the options are limitless. To help you narrow down your selection, start by looking for a light source with a high CRI (Color Rendering Index) to ensure that the colors of your kitchen are true. Then, choose a style that complements your home’s décor, whether you want to go with classic recessed lights or a more contemporary look with a high light rail on the ceiling. Finally, don’t forget about under-cabinet lighting, which can be an essential part of your kitchen’s design by performing multiple roles. It can provide task lighting for preparing food, accent your backsplash, and even act as a mood light when equipped with a dimmer switch.

Home Remodeling Benefits

Home Remodeling Tacoma WA is a great way to upgrade your living spaces and enhance your home’s functionality. In addition, modern upgrades can reduce maintenance and energy costs.

Home Remodeling

While renovations often involve cosmetic changes, a remodel typically involves a major alteration to the structure of the building. This includes adding, removing, or changing walls and rearranging the floor plan.

One of the biggest benefits homeowners receive from home remodeling is an increase in their property value. The value of a single-family house depends on the tastes and preferences of buyers in the local real estate market, and remodeled homes generally sell at higher prices than non-remodeled houses in the same area.

Homeowners who plan to sell their homes in the future should consider this when choosing what projects to complete. In the past, some projects recouped more than 100% of their cost at resale. These include wood decks, kitchen and bathroom upgrades, and window replacements. However, it is important to note that these percentages reflect averages and can vary greatly by region and the types of materials used.

Remodeling projects that improve a home’s appeal and functionality tend to generate the highest ROIs. Projects that appeal to a broad range of buyers, such as refinishing hardwood floors, are among the top home improvements in terms of return on investment. However, it is also important to remember that resale values are not the only reason to remodel a home. Many homeowners complete home improvement projects to enhance their living experiences and make their homes more comfortable and convenient.

For these reasons, it is not uncommon for a homeowner to decide to remodel a room or area that is not of major concern to them, as long as they feel the result will benefit their family and increase their enjoyment of the home. For example, a bathroom or kitchen remodel may help them achieve this by adding new functionality and convenience, thereby improving the overall quality of their lives.

In addition, a home remodel can make a house more attractive to potential buyers, especially if it is completed with resale in mind. The National Association of Realtors reports that some of the most popular remodeling projects that are likely to pay off when it comes time to sell a home include refinishing hardwood floors, adding a patio or sunroom, converting a basement into living space, and installing energy-efficient windows. These projects can add significant value to a home and are often considered the best investments homeowners can make when it comes to home improvement.

Enhanced Functionality

Home remodeling is also an excellent opportunity to upgrade the functionality of a space. This can include converting an attic to an additional bedroom or expanding the kitchen for more storage and cooking space. It can even include replacing outdated plumbing or electrical systems that are dangerous to use. With advances in technology, homeowners can now get a realistic view of what their finished project will look like before it is completed using computer software.

Whether you have a physical limitation or simply want a change in your lifestyle, the ability to remodel and customize your living space is a wonderful benefit that can help you feel more comfortable at home and live a happier life. Remodeling can be a great way to reduce the stress of having to maintain and repair older systems in your home or deal with constant reminders of old memories that you no longer wish to have in your home.

A full home remodel can also make your house energy efficient, helping you save money on electricity bills in the long run. You can replace older windows and doors that are often drafty, as well as install new insulation. This will improve airflow and make your home more comfortable throughout the year, allowing you to enjoy your living space without having to worry about high energy costs.

In addition, a full home remodel can help you increase your social life by providing an area that you can entertain friends and family in. This is especially helpful if you have a family with young children and need a space that can accommodate everyone. A new dining room or kitchen is a great place to host a party and give your children the chance to socialize with their peers.

In many cases, it can be cheaper to remodel your home than to move. Leaving a familiar neighborhood can be stressful for your family and leave you with many expenses to consider. Moving can also take a lot of time, and the kids may have to start over in a new school and miss their friends. The right home remodel can be an affordable alternative to making a costly move and can help you achieve your dream home.

Reduced Energy Consumption

Home remodeling involves structural changes that can improve the overall energy efficiency of a house. This includes updating the insulation, replacing old windows, upgrading the HVAC system, reducing air leaks, and more. These improvements can significantly reduce energy bills and enhance the functionality of your home. You will also save on maintenance and repair costs over the long term.

According to the National Association of Realtors (NAR), there was a surge in homeowners undertaking renovation projects during the pandemic. This didn’t necessarily stem from the health risk; rather, it was an opportunity to upgrade worn-out surfaces, finishes, and materials. Other reasons include adding features and improving livability, increasing convenience, and simply wanting a change.

Energy-efficient homes are a growing trend in the housing market, with many potential buyers seeking to make environmentally responsible choices when purchasing property. In fact, some homes are even certified as energy efficient through programs like LEED and Passive House, which can increase their resale value and appeal to eco-conscious consumers.

Upgrading to ENERGY STAR appliances and choosing low-flow faucets, toilets, and sinks can be a simple way to improve your home’s energy efficiency. Likewise, replacing your old windows with new energy-efficient models can cut down on your heating and cooling costs.

Another way to improve your home’s energy efficiency is by introducing more natural light through window replacement and installing skylights. This can not only boost your home’s aesthetic appeal, but it can help you reduce the amount of artificial lighting needed to brighten up a room.

Finally, you can lower your energy bills by implementing an energy-efficient lighting system. LED lights are a great option, as they consume less power than traditional options while providing the same brightness.

In addition to saving on energy expenses, you can increase your resale value by remodeling your older home with modern energy-efficient features. You can choose to replace your existing windows with more energy-efficient models, or you could consider insulating attic and crawl spaces, replacing your doors with more energy-efficient ones, and installing a smart thermostat to help you manage your energy usage.

Increased Resale Value

Home remodeling can add significant value to your property, especially if you choose wisely. Remodeling projects that have high return on investment include kitchen and bathroom renovations, adding new living space like a room addition or basement finishing, and updating heating and cooling systems. Energy-efficient upgrades also have the added benefit of reducing your utility costs and carbon footprint.

A good reason to consider a home remodel is to improve your comfort and enjoyment of your living spaces. However, it’s important to balance this with your long-term plans for the house and how a potential sale will affect your financial situation. The best way to do this is to create a design plan that incorporates your needs and goals for the house, while keeping in mind how a potential buyer may respond.

Whether you’re thinking about selling your house in the future or simply want to make it better for yourself and your family, a home remodeling project can help you achieve these goals. The key is to understand what improvements will have the greatest impact on resale value and how they might affect your home’s overall design. This requires careful planning and consideration of the current and future functions of each space.

The most popular home improvement projects are kitchen and bathroom remodels, enlarging existing rooms to make better use of floor space, improving storage options including walk-in closets, adding outdoor living spaces like patios and sunrooms, and enhancing indoor lighting. Choosing the right professionals and a clear vision for the project are crucial to its success.

When you’re making home improvements, don’t forget to keep your neighbors in mind. A poorly maintained home can be a real eyesore in a neighborhood, so make sure to improve your curb appeal by painting the front door or replacing the mailbox. It’s also a good idea to upgrade the exterior of your home with eco-friendly materials that reduce energy consumption and carbon emissions.

While a home remodel can significantly increase your living space and the value of your home, it’s important to choose a remodeling company that has a track record of working with clients on their budgets and time frames. A reputable home remodeler will provide you with a comprehensive design process that includes the option to visualize your finished results using advanced 3D software.

Important Details About Window Replacement

Window replacement is a major investment, but there are many options to choose from. To help you make the best decision for your home, our experts share some important details about window sizes, frames, and features. For professional help, contact Your Home Exterior Solutions now!

Window Replacement

Unless you’re building a new home, you’ll probably be selecting windows that are designed to fit into existing window openings. This is called a “pocket” window.

Window replacement isn’t just about replacing your existing windows – you need to know how the new window will fit in the opening. Window measurements include the width and height of the frame, but also the depth and sill. It’s important to get these measurements right before ordering a new replacement window to ensure that it will fit properly and won’t require further modifications during installation.

To measure a window’s width, you need to lift the sash and expose the jambs. Jambs are the vertical parts forming the sides of the frame where the sash slides up and down. The bottom measurement should be taken at the far left side of the window, and the middle and top measurements should be made at the near left and right side of the frame. It’s important to take three measurements in each location so that you can compare them. The smallest of these measurements will be your window’s true width measurement.

Next, you need to measure the height of your window opening. Start by measuring from the window sill to the head jamb on the left, middle, and right side of your frame. If the measurements are different, choose the shortest measurement to be your height. You may need to repeat this process if your frame is slightly crooked, which can affect the measurements.

Once you have the measurements for your window, it’s a good idea to do one final check to make sure that your frame is square. To do this, extend the tape measure diagonally from the lower left corner of your frame to the upper right corner. If the measurements match, then your window opening is square and can accept replacement windows. If the measurements aren’t even, you will need to have your frame rebuilt and remeasure the opening before installing new windows.

Once you’ve taken your measurements, be sure to write down the exact dimensions in inches. This will allow you to reference them later when selecting a replacement window. It’s also a good idea to bring the measurements with you when shopping for windows so that a professional can provide you with recommendations based on your specific needs.

Frame Materials

The frame material is a crucial factor in window durability, lifespan, energy efficiency, and appearance. There are several different window frame material options, each with their own advantages and disadvantages. Ultimately, the decision will come down to your specific needs and preferences.

Wood Window Frames

Traditional wooden frames are a popular choice due to their classic look and homey aesthetic. However, they require regular maintenance to protect against rot and swelling in wet weather. Additionally, wood is not as durable and insulating as other frame materials, and it is also susceptible to damage from harsh sunlight.

Vinyl Window Frames

Made of polyvinyl chloride (PVC), vinyl is a durable and affordable option that can be molded to fit nearly any style of window. It is a good insulator, and it can help you save on utility bills by reducing heat transfer throughout your home.

Fiberglass Frames

While more expensive than other frame materials, fiberglass frames are strong, durable, and incredibly energy efficient. These frames have air cavities that can be filled with insulation, helping you achieve better energy performance compared to standard vinyl and wood frames.

Aluminum Window Frames

Aluminum frames offer a sleek and modern look that complements modern home styles. They are rust-resistant and easy to maintain, and they won’t fade in harsh sunlight like other frame materials.

Steel Window Frames

If you’re looking for a modern and industrial-looking window frame, then consider steel. Steel is tough, durable, and fire-resistant, making it an ideal choice for safety-conscious homeowners. Steel frames are also difficult to break, making them a great choice for homes with security concerns.

While there are many factors to consider when choosing a new replacement window, understanding your options can help you find the right frame for your home. By considering the durability, style, energy efficiency, and maintenance requirements of each frame type, you can make an informed decision that best meets your needs. To learn more about the various window frame options available, speak with a professional from a reputable window company near you. They can guide you through the process and help you choose a window that will enhance your home for years to come.

Sash Style

A single shattered pane of glass can make a big difference to the overall appearance of your home. Fortunately, you don’t have to invest in an entirely new window to restore your home’s look. A sash replacement kit allows you to replace only the top or bottom part of your window while retaining the original frame. This guide explores the pros and cons of this option to help you decide whether it’s right for your home.

To start, clean your window frames of any dirt or debris. Then, use a tape measure to determine the height and width of your frame openings. Take the measurements at three points on both sides of your window: the sill, head jamb, and mid-point between them. The shortest measurement will be your window sash size. With the information from your measurements, purchase a window sash kit that aligns with these figures.

Most older wood windows have a balancing weight system that helps raise and lower the window sash. If you have this type of window, there will be telltale ropes feeding into the window sash from both side jambs. Once you remove the sash, you can usually identify the balancing weight by its heavy lead or iron cylinder that’s enclosed in a hidden cavity.

Once the sash is removed, you can begin removing the old window’s hardware and moving parts. You’ll also want to score the edges of your window stops with a utility knife and gently pry them off. Once the sash stops are removed, you can pull the sash away from the window frame and place it to the side of your work area.

You may need to cut the staff bead if it’s glued or nailed into the frame. This can be difficult to do, but it’s essential for proper installation of the new sash. To finish the project, install a meeting rail and anti-draught strips to your window. Finally, attach a sash lock to your new window so it can’t be opened or closed by someone outside. With the right care and maintenance, your new sash will last for many years to come.

Installation

A professional window installer will place drop cloths and tarps around the work areas both indoors and out to protect your floors from dirt and dust. He or she will also cover any furnishings located within a few feet of the windows to ensure that they are not accidentally damaged during installation.

If you are planning a do-it-yourself (DIY) replacement, be sure to purchase the proper tools for the job. This includes a caulk gun, shims, a tape measure and a hammer or power drill. Proper installation is key to a long-lasting, energy efficient window.

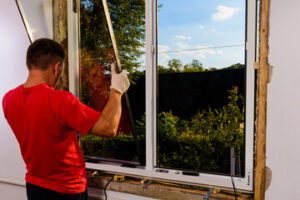
The first step in installing a replacement window is to remove the old window. To do this, start by pulling out the sash with a pry bar and then using a crowbar to break the nail fins free of the brick or sheetrock.

Next, remove the outer trim and if necessary, cut the sill to size. This will reveal the rough framing on both sides of the opening and can help determine whether you need to replace it as well. If the frame is in good shape, you can opt to install an insert window. Insert windows consist of a secondary frame that fits into the existing head jamb and sill.

If the frame is rotted or in poor condition, a full-frame replacement is necessary. This involves removing the entire head jamb, side jambs and sill and starting from scratch with new construction framing inside and out.

Once the frame is stripped, it is ready to accept the new window. Before doing this, however, you should test the sash operation. If it opens and closes smoothly, you can move forward with the project.

Before installing the new window, you should apply an elastomeric caulk to the exposed inner face of the exterior casings and blind stops. This will prevent water and condensation from getting into the house. Also, spray foam into the sash-weight pockets in the side jambs and center the window in the frame. Then, install the window and shim it to make it level and plumb.